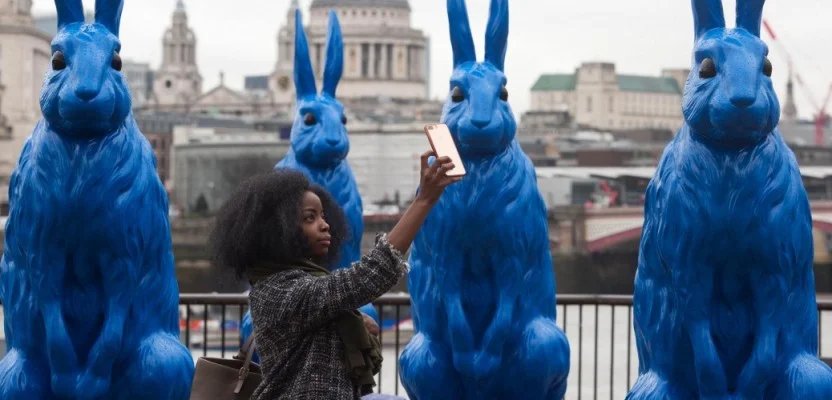
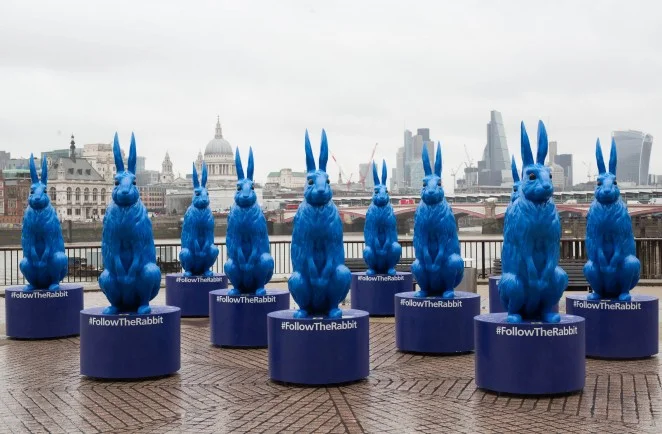
02 Rabbit mascots for a live experience campaign, 6ft high not including the base! The initial sculpt was made then molded, cast, trimmed and painted.
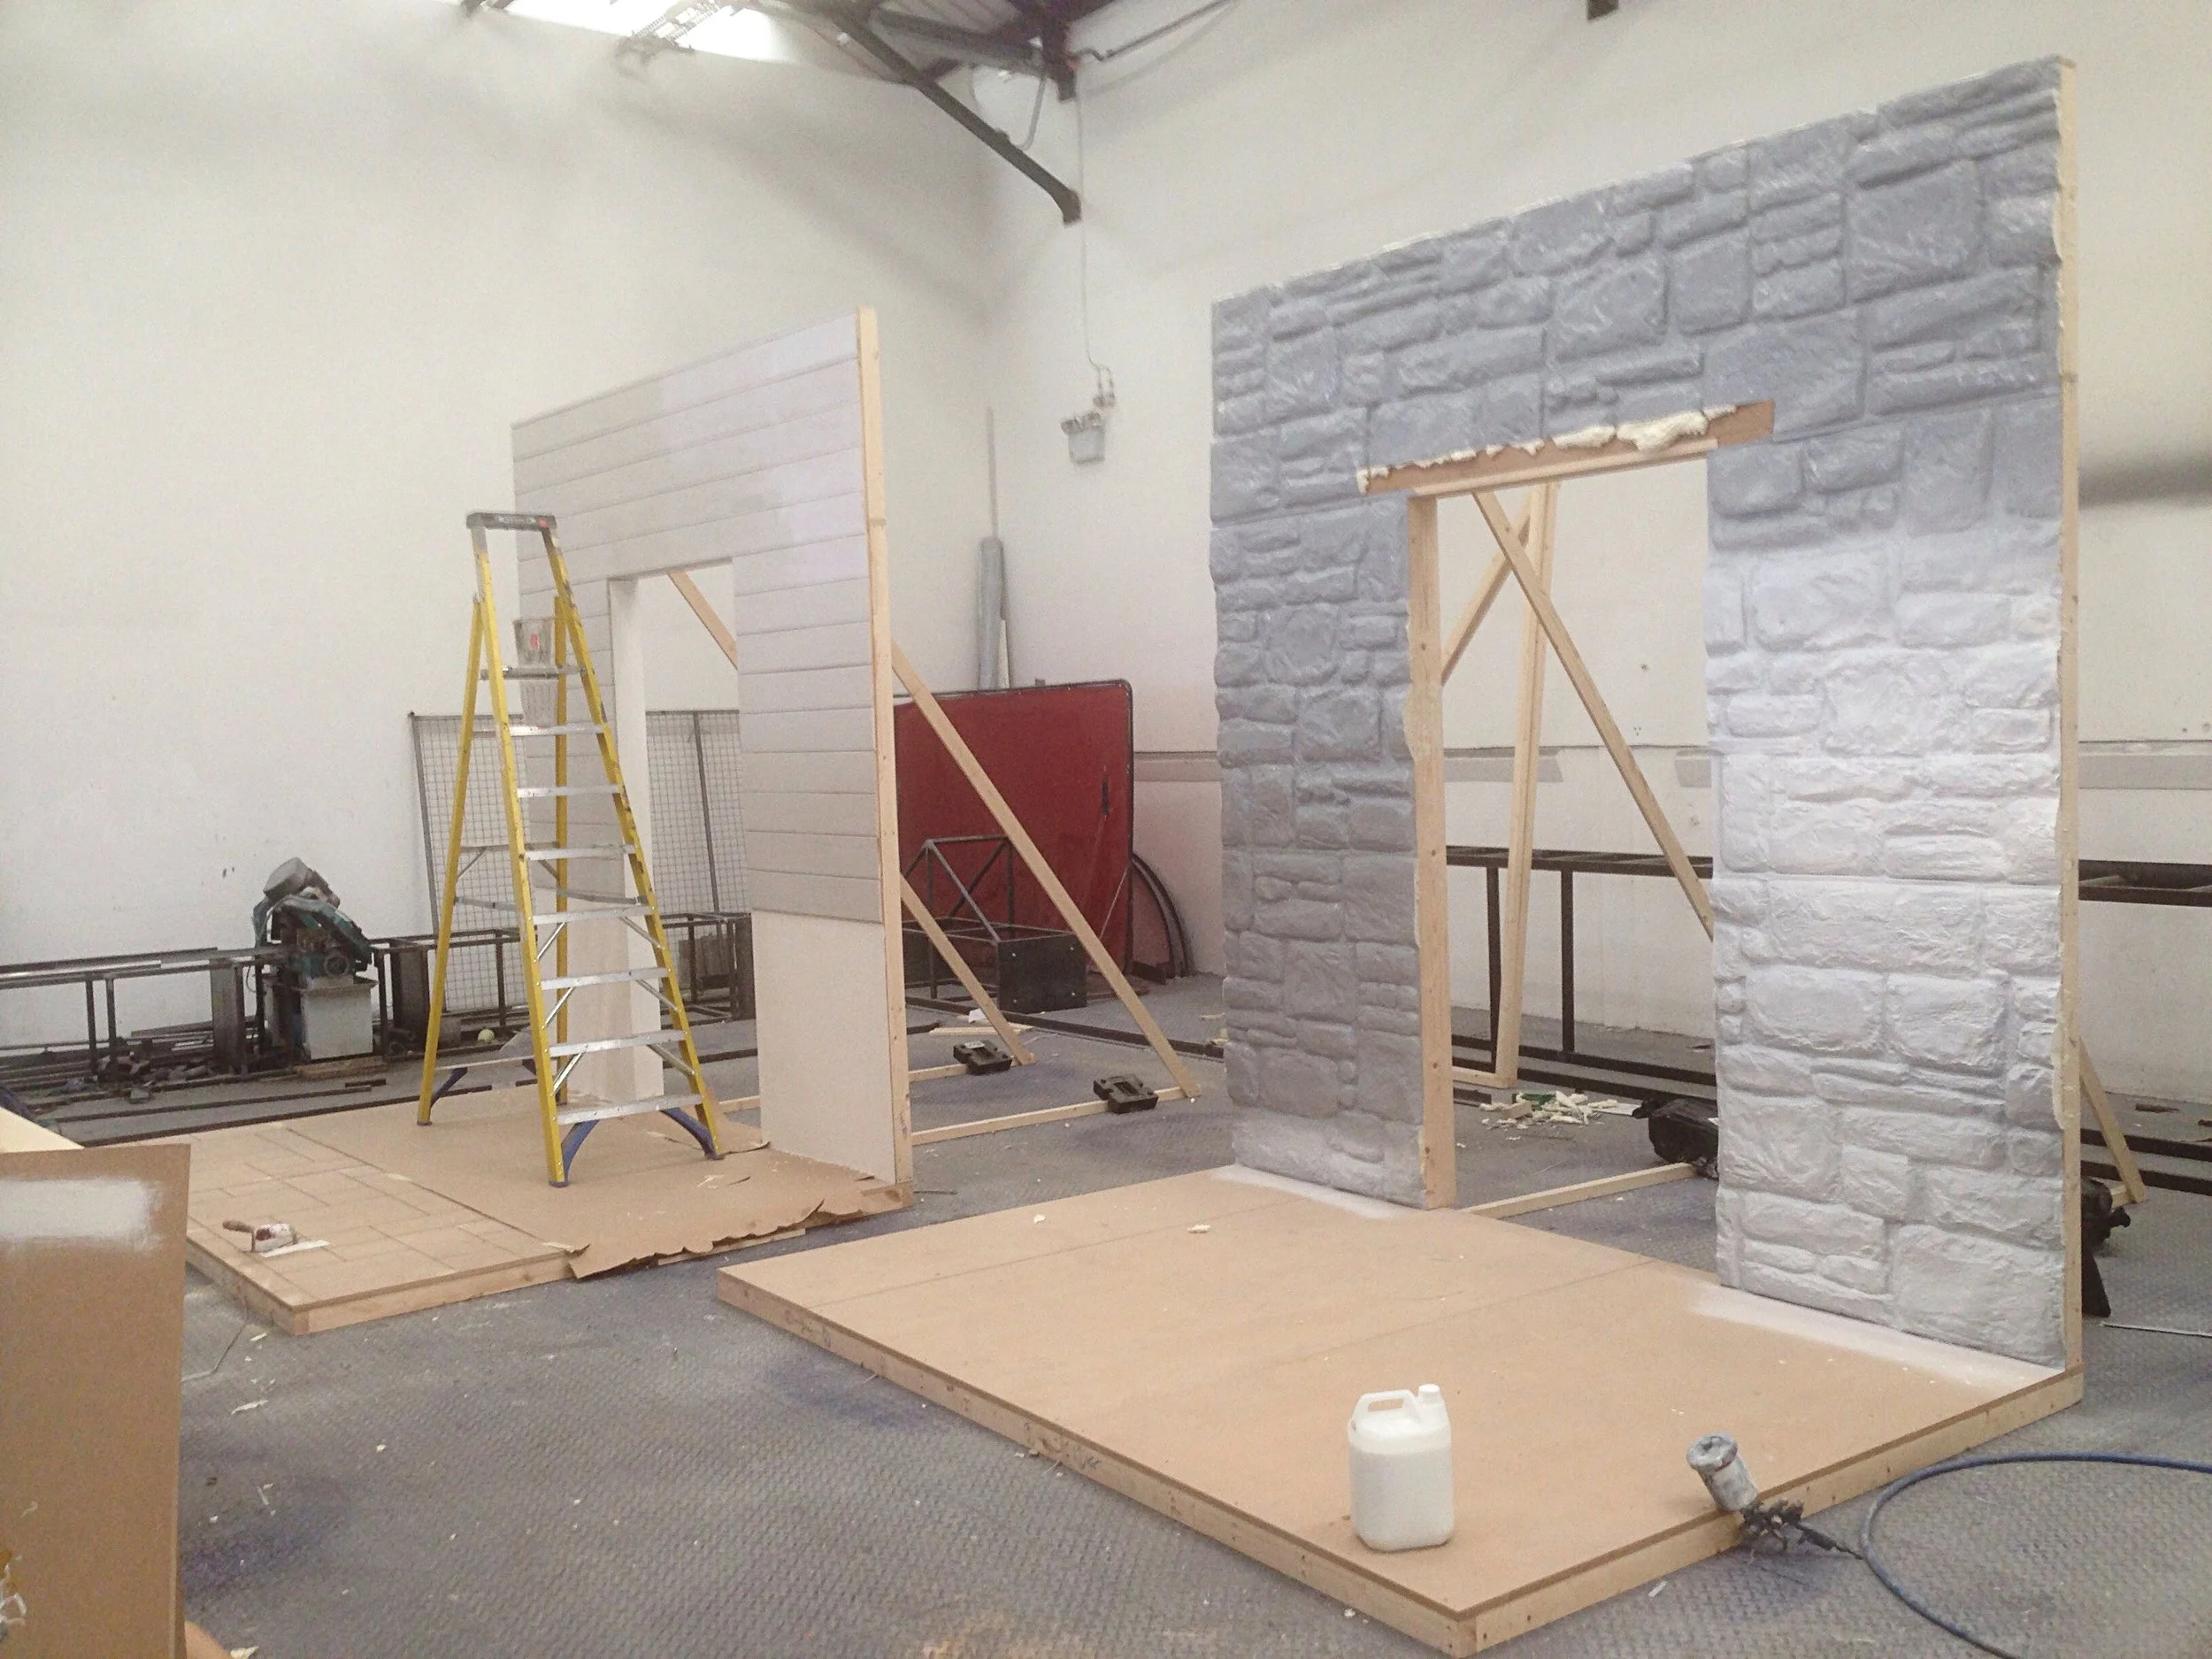
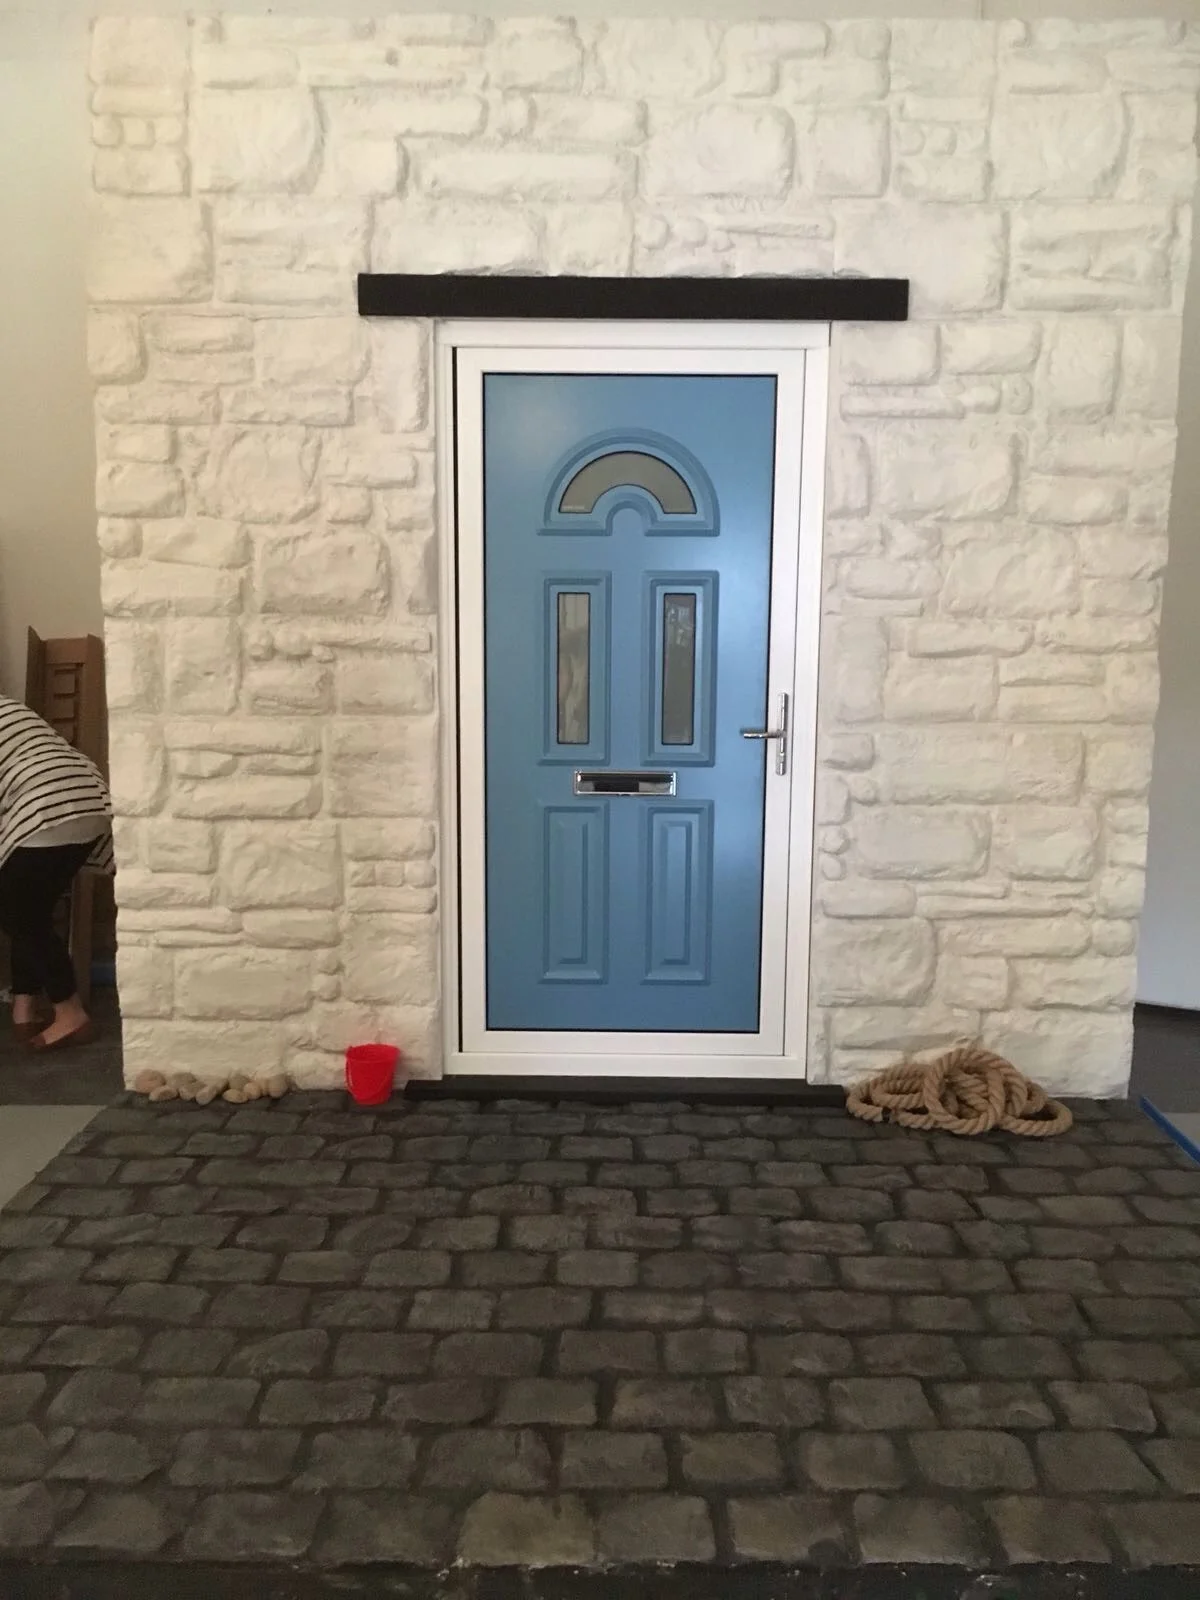
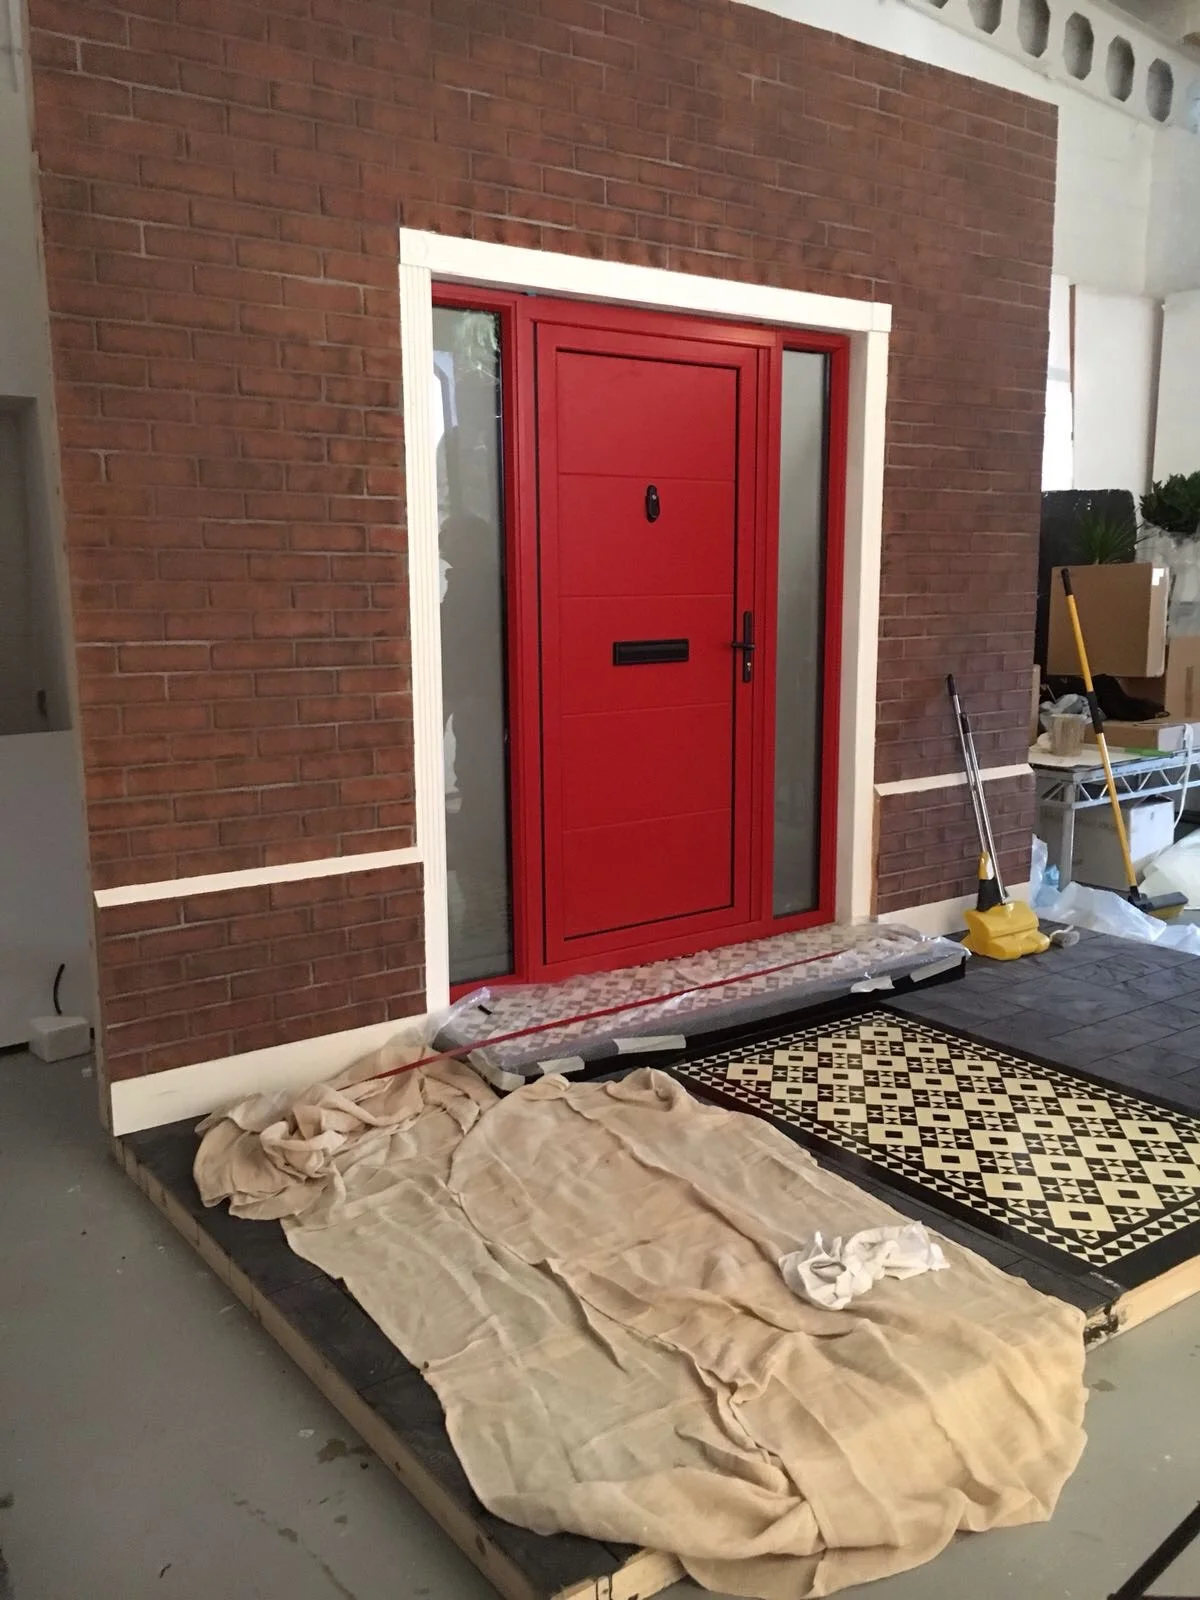
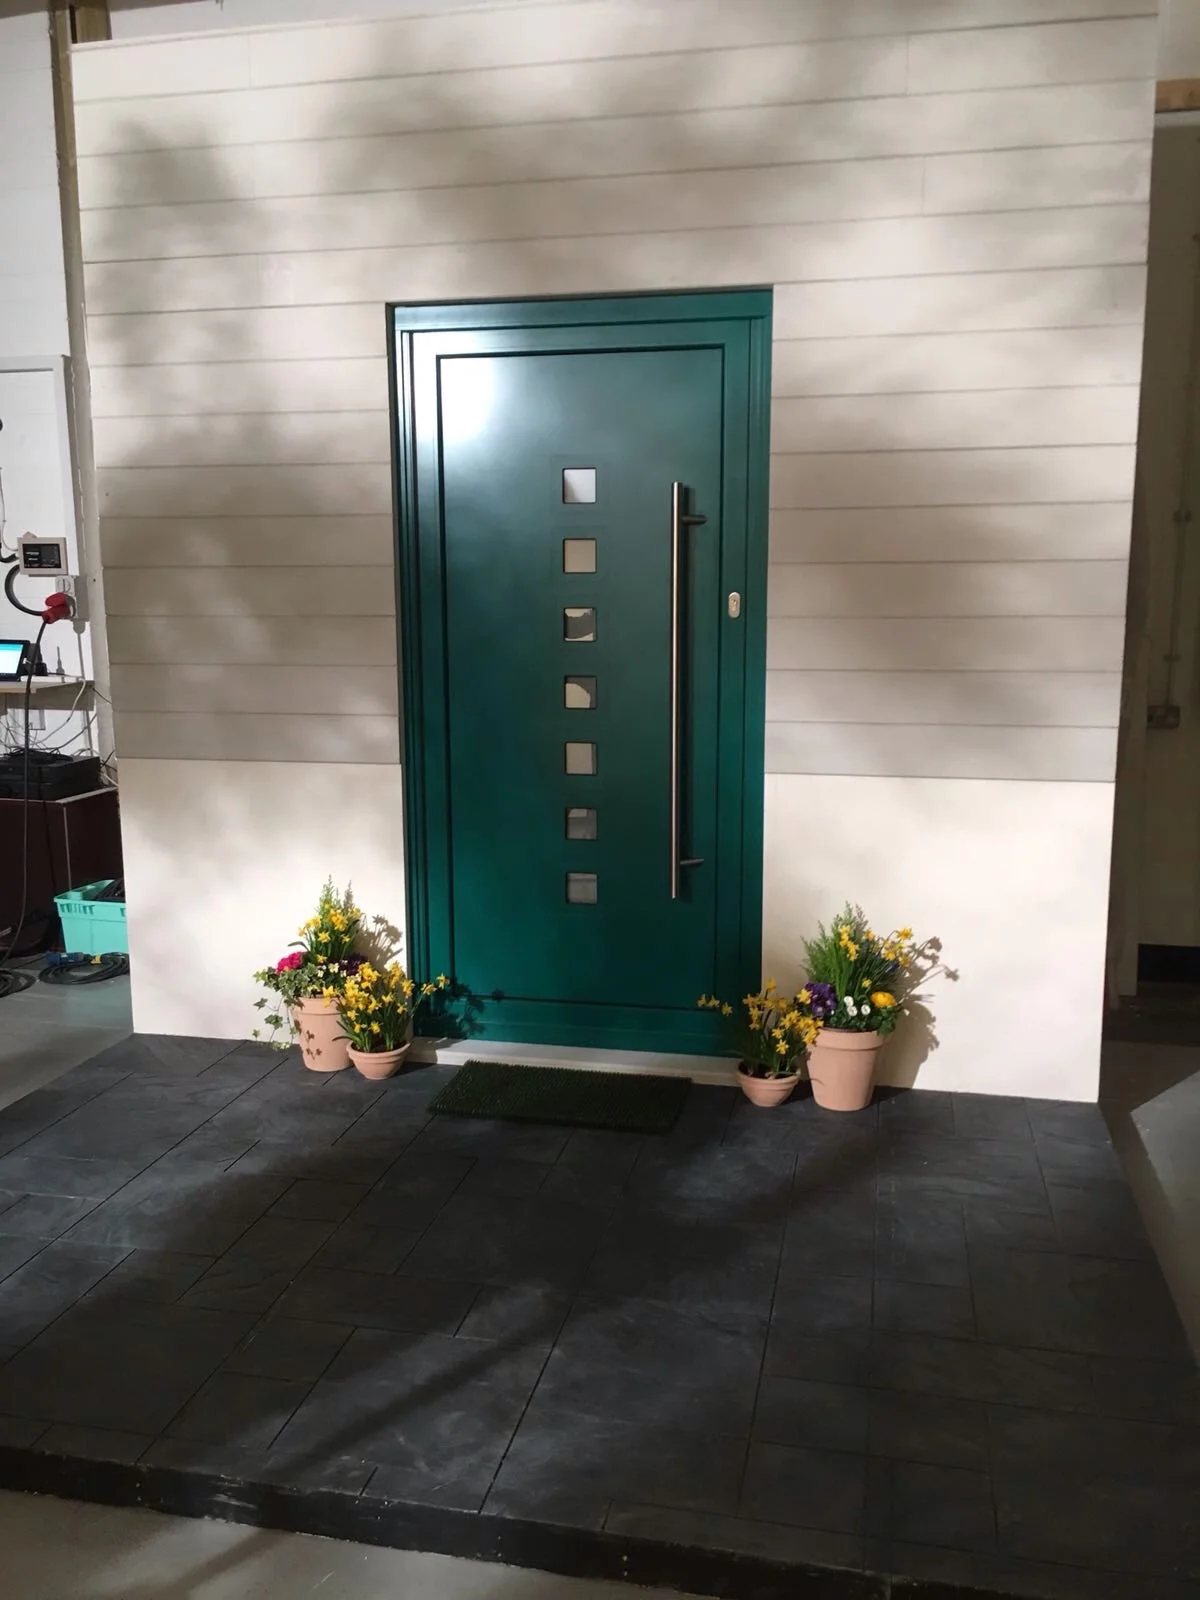
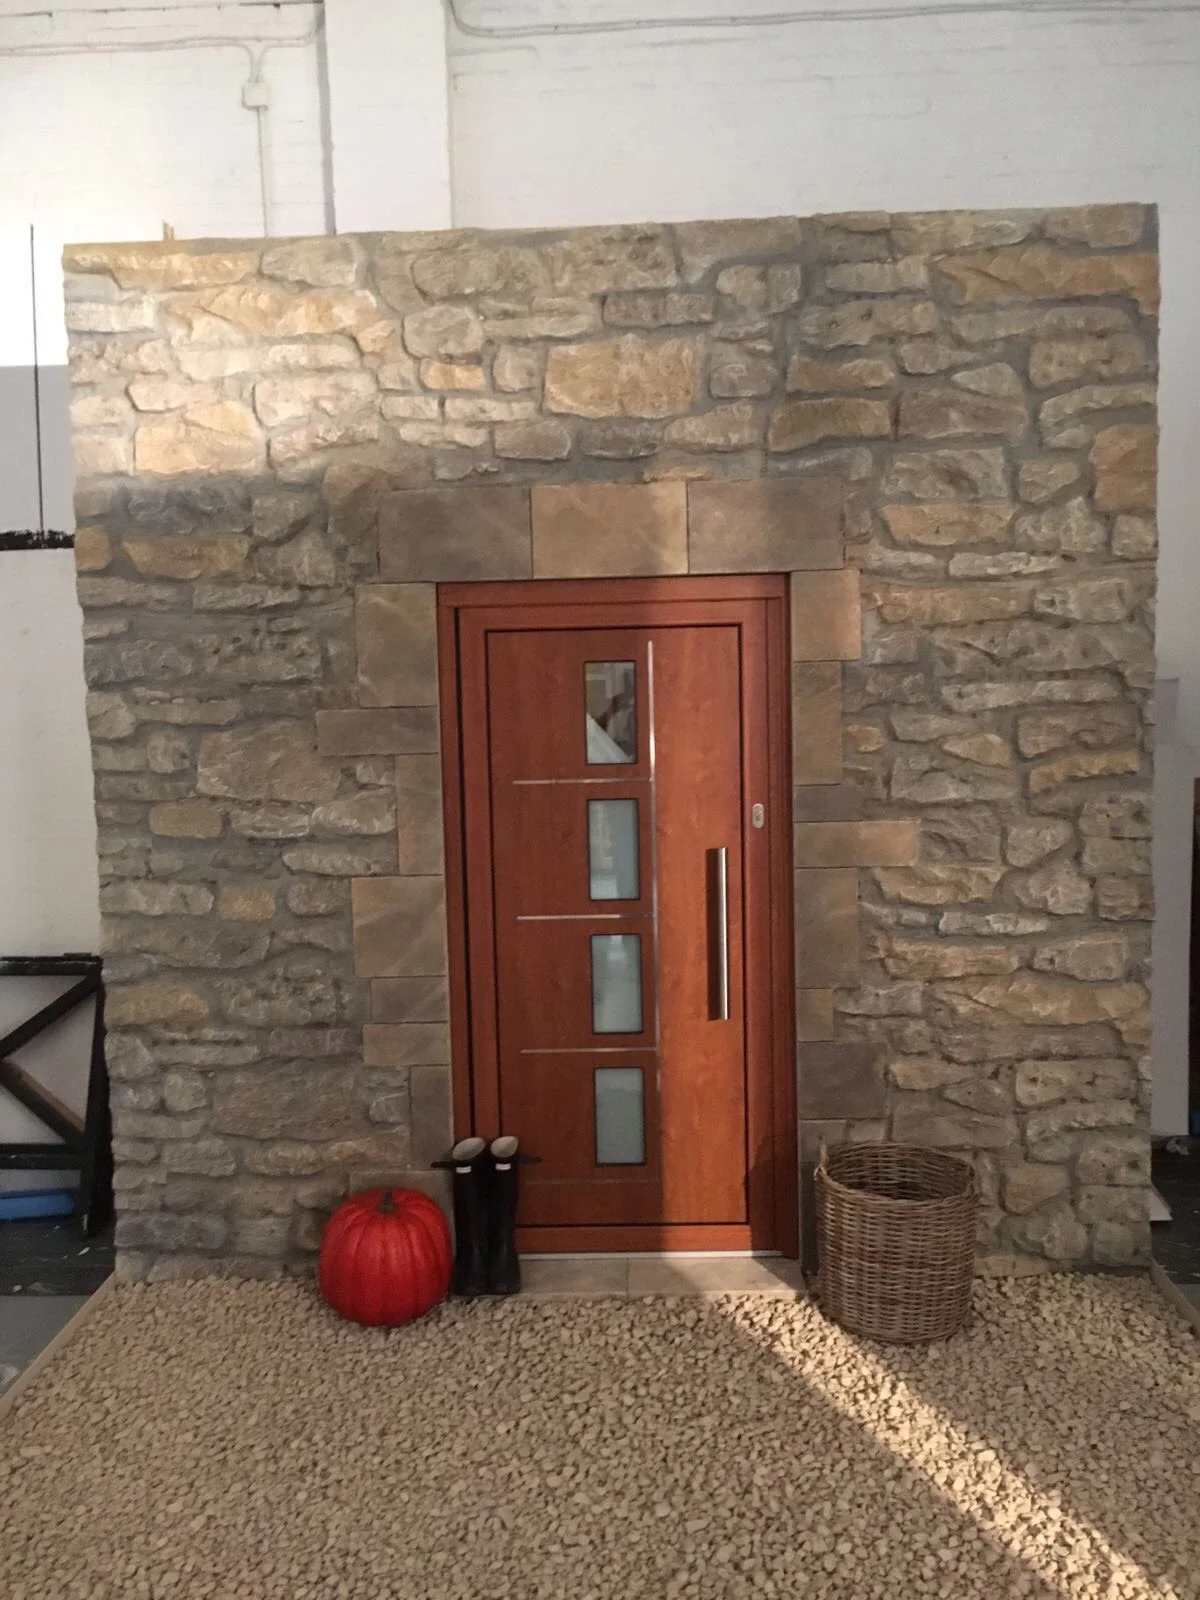
SET BUILD FOR ORIGINS DOOR AND WINDOW ADVERT
Set Build of four front doors for an advert. Flats built, erected and braced, clad with vac formed brick work and mdf. Detail added and painted to bring to life! Really enjoyed this job, most of all the scenic painting part.
PETER PAN GOES WRONG
PETER PAN GOES WRONG
This was a stage/television production that required us make a huge tree with door and steps, using a wooden frame we clad the structure with off cuts of polystyrene and contact adhesive before sculpting the tree. The whole structure was then covered in a thick Idenden coat and painted.
HACKETT ROCKS
HACKETT ROCKS
POLY SCULPTING & SCENIC PAINTING
A job creating large balancing rocks from polystyrene for shop window displays with the brand 'Hackett'
Using a hot wire and surform the rocks were sculpted down to size and stacked together until I was happy with the look, they were then given a few layers of Jesmonite mixed with gravel and sand for strength and texture before being painted and adding moss.
HAVAIANAS
A Minion made from flip flops for Havaianas! A nice small job with a broad range of skills used including spraying, casting and sculpting. Great fun to work on and be a part of, though the hardest part with this was making the flip flops fill the body as we only had a small amount. As always though we found a way and the finished chap was shipped off to Barcelona.
BURBERRY
A Burberry Christmas themed doll job, including a Mrs Clause and Snowman. Lovely simple moulds needed for this job which were then cast using fast cast and biscuit foam, wonderful heads made from wood then sealed and glossed. Got to use the lovely new spray booth and mould room for this job. Though the most difficult part was sourcing threaded inserts on a Sunday!
MARC JACOBS
Giant make up props for Harrods, A lot of gloss black and chroming, including a clear cast. A very difficult job which pushed the team to its limits! Lots of moulding to be done on this job including platinum cure silicon and solid gel coat and fibre class moulds. Perfectly round cylinders and tubes coupled with a chrome finish meant everything had to be perfect, that and it all had to be fire retardent!
STAR WARS
A collaboration with Prop Shop and Pinewood Creative. Life size Star Wars figures for promotional purposes anticipating the release of the new film. Lots of casting was done on this one, working with huge, full body moulds and Storm Trooper helmets. The hardest was the Kylo Ren mould which had to be done quickly and consisted of five different parts, I have fond memories of my hand cramping up as I applied so much gel coat in such a small period of time!
INTERNING | TWO GIANT LEGS
Q. Do you want to make a pair of giant can can legs to go above a cinema in Brighton?
A. YES
Interview over I arrived in Brighton’s neighbouring town, Seaford, the following day to a frosty yet warmly lit garage already housing two giant polystyrene legs. Also in the room, and appearing very small next to such a creation, was Jamie McCartney who I met the previous day at his small sculpture studio in the heart of Brighton’s infamous Laines. He greeted me with a mixed look of gratitude and ‘do you really know what you have let yourself in for’ and I quickly understood why. These legs were huge, around 12 ft high and as thick a 100 year old oak tree, and they both had to be fibreglassed. Now, fibreglass is a great material, its strong, lightweight and waterproof. We build boats out of the stuff. It is, however, very smelly and very messy. Still, whats not to like? I'm a young man, everything I do is smelly and messy. I rolled up my sleeves and got glassing.
Once the fibreglass had set solid we had an incredibly rigid, strong but lightweight sculpture of what vaguely resembled a pair of legs. Almost done then, I thought, all we need to do is get them smooth and were in business? True. Though I had over shot the length of time it takes to get things of that size smoothed off... Using car body filler I went over and over each of the legs, sanding and filling, sanding and filling. Taking care to keep the form and remove any flat spots and air bubbles created in the process. It took almost two weeks. Almost done? yeah, nice one newbie.
With the end in site, meaning the deadline set by the client, it was all hands to the pump as we washed down each leg maticulously with acetone and then panel wipe to ensure they were dust free and clean for the spray painting. Begining with a primer and then white before masking off the individual stripes to be painted red, followed by a clear gloss for a shiney finish and to ensure these legs will stand the test of time.
The following day they where taken to the Duke of Yorks at Komedia cinema and installed above the entrance, they look terrific!
1000 HANDS
The production of around 500 pairs of hands to display shoes for the brand Camper.
Starting from a life cast of four different positions, followed by the finishing of each master copy and production of a mould for each. Then the casting out of hundreds of hands that then had to be filled, sanded and sprayed, put on bases and packed. This was a mammoth production line job in the famous Pinewood Studios.
This job was rather straight forward in theory but in practice was far from the truth. The moulds deteriorated quicker than expected leaving a vast amount of sanding and filling in order to clean the hands up. That added to the re pouring of the silicon, the many stages of painting, the ample air holes that occurred during casting and the whole basing and packing meant that we were up against it after the first week!
Still, we got them finished. Just.
FULL BODY CAST
A short while after interning for Jamie I was asked back to help with another project, though this one wasn’t quite as big physically, it certainly was in terms of work load and difficulty. A complete body cast of glamour model Natasha Marley. This was an important project, not only for myself but also for Jamie, a full body cast, he informed me, was no mean feat. It required a massive amount of planning, and organising, not to mention materials which would go to waste at his expense if we didn't get it right first time. No pressure then.
We first set about building a rig for Natasha, due to her pose being a little awkward, it needed to support her enough to make the casting time bearable. It was also an important part of the casting phase, as we needed to take a mould in two parts, front and back, as this allowed us to lean her forward to cast her back without losing the shape of her front. We also added a small wooden wedge under her right foot as the pose meant she would otherwise be standing with her weight on her left foot for a considerable amount of time.
On crunch day we gathered in the small studio, all five of us, and prepared everything for the big jump. A lot of buckets, bags of alginate and plaster bandages were carefully laid out in optimum grabbing in a rush position. Natasha then arrived and after another few run throughs we were all ready for the real thing. The rest was a blur, after covering Natasha in moisturiser, a thick layer of alginate was applied to her front followed by a thin layer then red hot plaster bandages for support. There's nothing like red hot water to remind you how much skin your finger tips are missing after weeks of sanding. A flange was then added to the plaster and greased up with more moisturiser before the same process was then repeated on her back before she was finally released. The two parts were then screwed together and sealed with tissue paper so as not to lose any moisture before they were cast. Just the head left. The same process is observed with careful precision so as not to block off her breathing, and cling film used to cover her hair. Easy right?
Casting the moulds was another matter, the head was done using plasterline with fibreglass to give it support. As for the body we used a strange filler and resin mixture for the first layer followed by a layer of fibreglass for strength. Once dry the alginate and plaster was removed, leaving a positive likeness, though not perfect yet, of Natasha.
THE 1920's BATHER
A 1920’s bather, complete with removable towel and stylish cap, which incidentally were the two hardest parts of this job. As part of a project to restore Cleethorpes Lido to its former glory a statue was commissioned that had to mimic an original poster from the early 20th century. The process was very much the same as the last full body cast but with the exception of clothes being added to the equation, which had to be moisturised excessively to avoid the alginate sticking to them, and was a lot more confident approaching this.. I wasn't expecting the model however, who had gone out for ‘few drinks’ the night before, to fall out of the mould half way through the process. Splitting the alginate and almost ruining the mould so that copious amounts of super glue had to be applied in order to save the mould.
The difficult part was creating the towel, it had to look like fabric but also be removable in order to be painted later on. We decided on using a real towel first and once in place coated it with resin to harden it, it stayed worryingly damp with resin a lot longer than expected but eventually dried and hardened leaving a sturdy towel. I then applied large amounts of car body filler across the surface and sanded smooth.
LOLA GATSBY
My third full body sculpture, though this one with a strange twist, it was to be a water feature
Of a girl urinating.
Into a swimming pool.
Thus meaning on the day as we positioned the model to be cast we had her place both hands on hips, pelvis thrust out, chin up and arched back in a fabulous if not a tad ridiculous position known only as the ‘pissing pose’. Not to mention an all important grin spread across her face as this ‘statue’ revelled in the sheer cheek of relieving herself in our clients pool.
On the day everything went well, though when it came to casting the mould I had found I had mixed the resin far to viscously the evening before leaving a lot of air bubbles in the mix. This meant I had a lot more post casting filling to do than usual. lesson learnt.
The rest of the process went without hiccup, sanding smooth and filling where necessary. The head was sculpted expertly by Vicky Ball who captured the look perfectly, with an exceptionally cheeky grin. I then made a two part jacket mould of the head, cast it and attached it to the body leaving only the plumbing left to be sorted.
A hole being made in her heel and a hose fed up the leg which connected to a spout drilled and placed perfectly with a metal bracket used to hold it in place. We then rushed to turn on the tap and test our creation. Bingo! a perfect steady stream.
FACE, EYES & HAIR
Casting a face is a whole different ball game than that of a body. First of all you can’t cast hair or eyes and it is also kind of important not to suffocate your model. Luckily after working at the studio for almost a year and a half I had the knowledge and confidence to do this... on a very close friend. Prior to casting I did warn her of possible death and made absolutely sure she knew what I was doing, to relax and not to panic once the process was underway. Covering hair with cling film and moisturising eyebrows I began the process, slowly covering her face from top to bottom with a rather wet mix of alginate. Carefully leaving her nostrils free. Applying plaster bandage for support and waiting for this to set I then finally released her, discovering to my joy and relief she was alive and well. Then plugging the nostrils with more alginate I cast the mould with plasterline ready for trying my hand at sculpting.
By watching our in house professional Vicky Ball sculpt many faces throughout my time I had learned a trick or two about how to approach such a task, this certainly didn't make it a walk in the park however. My biggest trouble was of course the eyes and the hair, finding this to be quite the trial and error process, not giving up however I eventually reached a look I was happy with.